

Essential Safety Features for Every Shower
Safety Features for Every Shower Shower safety is a top priority for a secure bathing environment. Falls are the leading

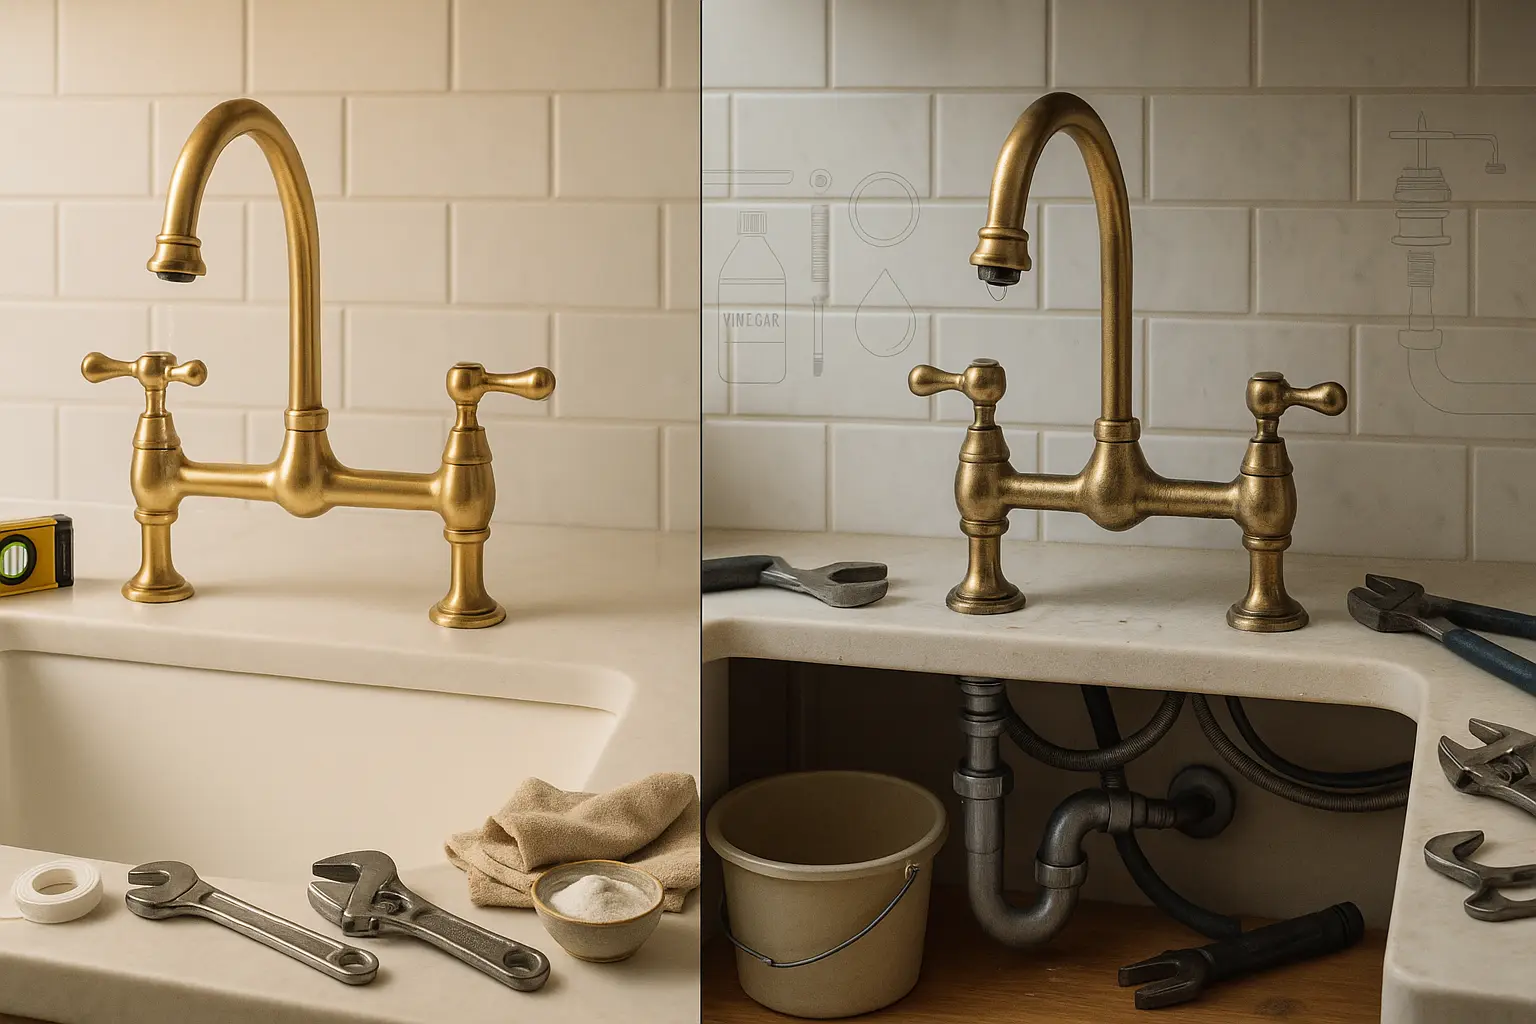
Installing a kitchen faucet might seem straightforward—but even small oversights during the process can lead to long-term issues like leaks, poor water flow, and damage to your countertop or cabinetry. Whether you’re updating your existing fixture or setting up a stunning unlacquered brass kitchen faucet, avoiding these common mistakes ensures your faucet looks and functions perfectly from day one.
In this guide, we’ll highlight the top 7 kitchen faucet installation mistakes to avoid, especially for homeowners installing premium designs like bridge faucets or solid brass models. Knowing these in advance can save you time, money, and frustration.
Installing a faucet isn’t just about tightening a few bolts — it’s about understanding how your specific space, plumbing, and fixture type work together. Taking time to prepare before installation reduces the risk of costly errors, especially when dealing with high-end pieces like unlacquered brass kitchen faucets or bridge models that require precision.
If you’re unsure whether your faucet choice suits your setup, our article on How to Install a Bridge Kitchen Faucet offers installation visuals and compatibility tips.
Before installation, always confirm that your new faucet matches your sink’s hole configuration. Many sinks come pre-drilled with 1, 2, 3, or even 4 holes—and not all faucets are designed to accommodate them.
If you’re upgrading to a vintage or traditional style, explore our Best Bridge Faucets to find models that match your setup.
A common mistake is buying a faucet that doesn’t fit your space. Measure:
This is especially important with brass kitchen faucets, which often feature higher arcs or wider bases that make a statement—but require proper spacing.
It’s tempting to crank every connection as tight as possible to “prevent leaks,” but this can:
Always follow torque specifications and use thread seal tape (plumber’s tape) where needed—especially on compression fittings. If you’re installing a bridge faucet, refer to our detailed installation guide for proper tightening techniques.
New installations often carry debris—like metal shavings or sediment—from old plumbing or recent renovations. Skipping this step may clog aerators or damage your new faucet.
What to do:
This is a simple but critical step in protecting high-quality finishes like those found in unlacquered brass faucets.
If the faucet body or handles are even slightly off level, it can lead to:
Use a level tool to align the faucet precisely—especially with bridge models, where both handles and spout are mounted independently and must match in height and distance.
Many faucets come with built-in rubber gaskets, and in most cases, these are enough to create a watertight seal. However, some homeowners still add excess silicone or plumber’s putty, which can:
Pro Tip: Only use sealant where the manufacturer recommends—and never under the escutcheon or handle bases unless instructed. Clean lines matter, especially with exposed brass or vintage-style fixtures.
After a hands-on install, your faucet may have fingerprints, debris, or adhesive residue that can dull or discolor the finish over time—especially for raw or unlacquered brass fixtures.
To preserve your faucet’s beauty:
For detailed care techniques, check our tested guide on how to clean brass with household products and keep your new fixture glowing from day one.
Mistakes happen — even experienced DIYers run into issues. The key is to catch them early and correct them before damage spreads. Here’s how to respond if you suspect you’ve made one of the kitchen faucet installation mistakes outlined above.
If you’ve scuffed or dulled a brass faucet, don’t panic. Brass is highly forgiving and can often be restored:
You can find more restorative methods in our guide: How to Clean Brass with Household Products.
Avoiding these kitchen faucet installation mistakes will save you from common headaches and protect your investment in both time and money. From measuring correctly to preserving the finish, a little preparation goes a long way—especially when installing handcrafted or high-end designs like unlacquered brass kitchen faucets.
Looking for the perfect statement faucet? Explore our full Insideast collection for premium kitchen fixtures designed for beauty, longevity, and expert-level performance.
Safety Features for Every Shower Shower safety is a top priority for a secure bathing environment. Falls are the leading
Receive your order to your door address anywhere in the world using our shipping partners
You're covered by our 30 days return policy
Big part of our reviews testifies about the quality of support provided
Secured payments using renowned payment gateways